Speed isn’t a luxury; it’s the quiet salesperson that nudges strangers into customers. I’ve seen sites that looked identical before and after optimization—but the faster one converted measurably better. The good news: you don’t need a six-figure tech stack to get that lift. With a handful of free or inexpensive plugins, some sensible hosting tweaks, and a little testing discipline, you can shave seconds off load times and watch conversions climb. ⏱️ 10-min read
This guide walks you through the practical tools and the exact steps I use with small businesses and blogs. I’ll show caching, image optimization, database housekeeping, code minification, lazy loading, CDN pairing, and a 30-day rollout plan you can implement without selling your soul—or your ad budget. Think of this as performance therapy for your WordPress site: honest, slightly sarcastic, and effective.
Why speed and ROI go hand in hand
Let’s be blunt: fast pages make people behave. When product pages render quickly and lead forms appear instantly, fewer people bail and more people convert. I like to set practical targets—get product pages under 2.5 seconds and lead forms under 1.8 seconds—and then treat those numbers like promises. Those thresholds aren’t pulled from thin air; they align with Core Web Vitals guidance and real user behavior. Aim for LCP under 2.5s and keep CLS low (ideally <0.1; under 0.25 is acceptable). Hit those and Google will nod at your page experience while you quietly outrun competitors who think “fast” means 4 seconds.
Start with a baseline: record LCP, CLS, TTFB, bounce rate, and conversion rate. Make one change at a time—cache first, then images, then code—and measure after each step. Small wins stack: a 1–2 second drop in LCP often leads to visible lifts in conversions and organic rankings. Create a tiny dashboard (spreadsheet is fine) to track dates, changes, and impact. If you don’t measure, you’re just guessing—like throwing spaghetti at the wall and hoping it becomes a Michelin meal.
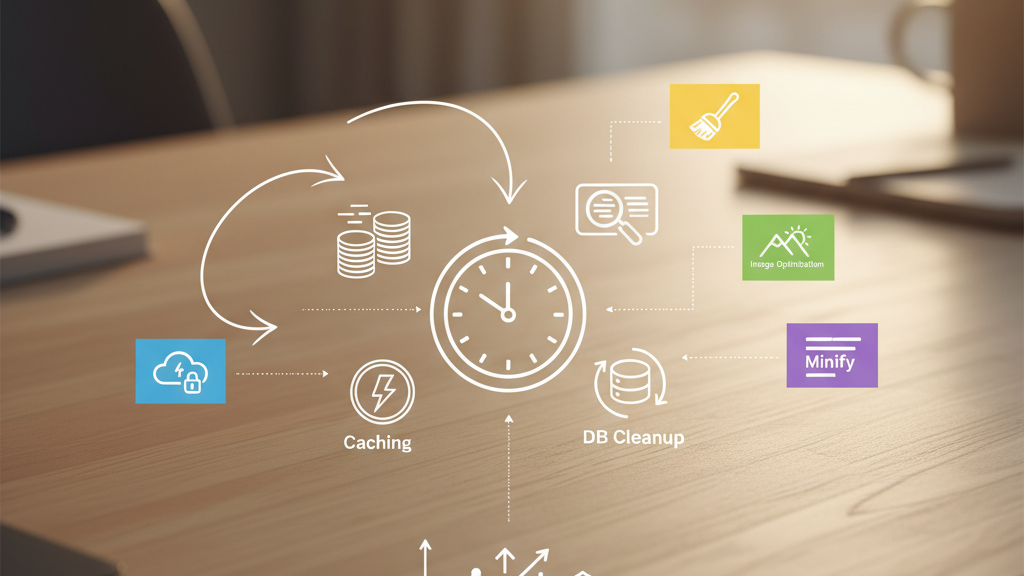
Free caching plugins that actually speed up WordPress
Caching is the low-hanging fruit of speed: serve static HTML to most visitors, and your server stops acting like it’s solving Sudoku for every page view. WP Super Cache is the straightforward option—flip on Simple mode, preload cache for your top pages, and purge after updates. It’s as dependable as a morning coffee and far less jittery than some human coworkers. W3 Total Cache is the Swiss army knife: page, database, object caching, and CDN hooks. Powerful, but it can be fiddly on dynamic sites (think carts and membership areas). If your site behaves like a diva, test on staging first.
WP Fastest Cache is lightweight and friendly for folks who don’t enjoy reading plugin manuals. Turn on Page Cache and Minify, and only combine CSS/JS if you’re comfortable troubleshooting display glitches. LiteSpeed Cache is the sleeper hit—if your host supports LiteSpeed servers it offers server-level caching and built-in optimizations that blow PHP-level plugins out of the water. In short: pick the cache that fits your host and site complexity, test pages that use dynamic features (cart, account pages), and always clear the cache after changes. If a plugin and theme get into a fight, it’s usually minification or object caching misconfiguring dynamic responses—disable those first and breathe.
Low-cost image optimization without losing quality
Images are often the heaviest part of a page. The trick is trimming bytes without turning product photos into watercolor experiments. Smush (free) is my go-to for blogs and small shops: automatic compression on upload, bulk-smush for older libraries, and adjustable quality. Start around 70–75% quality and test a few key product shots—most people won’t notice the difference, but they’ll notice speed. EWWW Image Optimizer offers both lossless and lossy options and can generate WebP variants, which are like giving your images a new pair of sneakers—lighter and faster.
Imagify’s free tier offers progressive compression options (Normal, Aggressive, Ultra) and WebP support too. Pick conservative settings, test, and then run bulk optimizations during low traffic windows—nobody wants a media library migration that coincides with your Black Friday flash sale. Pair image compression with sensible resizing: don’t serve a 3,000px image when a 900px version will do. And yes, combine this with lazy loading so off-screen images cost you nothing until the user scrolls. If you’re into acronyms, convert to WebP where compatible; if you’re into common sense, preview images before and after to ensure the quality still sells your product.
Database cleanup and optimization on a budget
A bloated database is like a garage filled with boxes labeled “I’ll need this someday.” Post revisions, trashed drafts, and expired transients make queries slower and backups clunkier. Don’t panic—this is one area where small, regular maintenance yields big returns. First rule: back up. Use UpdraftPlus or your host backup and save a copy offsite. If something goes wrong, restoring beats crying into your keyboard.
WP-Optimize is a friendly Swiss-army cleaner: remove old revisions, clear trashed posts, and prune expired transients. Use the Optimize/Repair tools to reclaim overhead from tables like wp_postmeta and wp_options. Advanced Database Cleaner is great when you want fine-grained control—identify orphaned metadata and scheduled cleanup tasks. Run these on a staging or low-traffic window, and schedule weekly or monthly cleanups. One trick I use: set a safe limit on revisions to keep the last 3–5 versions of posts; that keeps a revision history without hoarding everything since 2012. Think of database cleanup as brushing your teeth—it’s tedious, but if you skip it too long things get messy fast.
Minification, concatenation, and code optimization
Minification is like vacuuming the code: remove whitespace, shrink variable names, and reduce the number of files the browser requests. Autoptimize is the simplest, safest starting point for HTML, CSS, and JS minification. It can also aggregate files and defer non-critical JS, which helps rendering happen sooner. But be warned: minification can break themes and plugins if you’re cavalier. Always test on staging and use exclusions liberally.
For more control, pair Autoptimize with Async JavaScript to safely defer or async scripts that block rendering. If you’re using W3 Total Cache or WP Super Cache, they offer minification and concatenation too, but sometimes the combined settings lead to double-minification headaches—double trouble, and you’ll be the cleanup crew. My process: enable HTML, then CSS, then JS minification, testing after each step. If a button stops working or a layout collapses, exclude the responsible file and move on. Small, incremental changes keep you sane and your checkout process intact—because nothing says “lost sale” like a broken buy button five minutes before launch.
Lazy loading and asset management for faster page loads
You don’t need to load everything immediately—modern browsers and WordPress do lazy loading out of the box via the loading="lazy" attribute. Check your theme to ensure it doesn’t strip that attribute; if it does, either update the theme or patch the output. If native lazy loading isn’t behaving, a3 Lazy Load is a reliable plugin that covers images and iframes without drama. It’s like telling the browser, “Only bring what we need for now.”
Asset CleanUp (free) is the surgical tool for scripts and styles: disable unnecessary plugins’ assets on pages where they're not used. Start with high-traffic templates—homepage, product pages, blog posts—and disable everything nonessential. Then test thoroughly; sometimes a plugin injects a small inline style that, if removed, causes your layout to flail like a fish out of water. Watch third-party embeds (Twitter, Facebook, YouTube): they often pull in hefty scripts. Consider lazy loading embeds or using lightweight placeholders. A quick rule of thumb: fewer requests and smaller payloads = happier users. If this feels like digital decluttering, that’s because it is—finally, your site breathing room.
CDN and hosting tweaks that pair with cheap plugins
You can’t speed global visitors with local hosting alone. Enter Cloudflare’s Free plan: CDN distribution, automatic caching, Brotli/GZIP compression, and basic minification—basically a turbocharger you don’t have to finance. Point your domain to Cloudflare’s nameservers and enable performance features; it’s the online equivalent of renting a faster road for your traffic. (Reference: Cloudflare Free plan details: https://www.cloudflare.com/)
Complement that with hosting that supports HTTP/2 or HTTP/3 and server-level caching—those protocols let multiple files transfer more efficiently. Set long cache lifetimes for static assets and use versioned filenames so updates don’t force a full re-download. Enable GZIP or Brotli compression on the server to shrink HTML, CSS, and JS in transit. If your host offers LiteSpeed, consider LiteSpeed Cache (see caching section). I always recommend lean themes and minimal plugin installs: a bloated theme is like wearing seven layers in August—unnecessary and uncomfortable. Finally, tune cache headers and purge behavior: Cloudflare and plugin caches can be out of sync if you forget to purge after updates, which is how changes get served like relics from a museum.
Measuring impact and turning speed into ROI without breaking the bank
Measurement is where the poetry meets the spreadsheet. Use PageSpeed Insights, Lighthouse, and GTmetrix to track LCP, CLS, and TBT (Total Blocking Time)—these tell the story of perceived speed and interactivity. I keep a lightweight KPI sheet that logs baseline scores, change dates, and conversion data. Google’s Core Web Vitals docs are the canonical reference for thresholds and measurement methods (https://web.dev/vitals/).
Example time: I worked with a small WooCommerce store that cut LCP from 4.8s to 2.3s using caching, image compression, and lazy loading. The result? A steady, measurable uptick in conversions—not dramatic fireworks, but steady and profitable. The math is simple: if you increase conversion rate by even a fraction while holding traffic flat, you improve ROI without additional ad spend. Track revenue per visit and conversion rate before and after optimizations, and attribute cautiously—seasonality and promotions can masquerade as optimization wins. Run A/B-like comparisons by rolling changes to a subset of pages or traffic, or stagger changes and compare metrics week over week. If you like dashboards, a simple Google Data Studio or a spreadsheet with dates and deltas is plenty; you don’t need a data science degree to know you’re winning.
Putting it all together: a 30-day, budget-friendly optimization plan
Here’s a practical, low-stress 30-day plan you can follow. Think of it as speed bootcamp that won’t require a personal trainer or selling a kidney.
- Week 1 — Baseline and backups:
- Record LCP, CLS, TTFB, bounce rate, conversions (PageSpeed Insights + Analytics).
- Full backup with UpdraftPlus or host backup, stored offsite.
- Set up a staging environment or confirm staging on host.
- Week 2 — Caching and CDN:
- Install WP Super Cache or WP Fastest Cache (or LiteSpeed Cache if supported).
- Enable basic caching, preload top pages, and configure purge rules.
- Enable Cloudflare Free, point DNS, and toggle basic performance features.
- Week 3 — Images, DB, and minification:
- Install Smush or EWWW and bulk-optimize images at 70–75% quality; generate WebP if available.
- Run WP-Optimize to clean revisions and transients; optimize tables.
- Enable Autoptimize progressively: HTML, then CSS, then JS; test after each change.
- Week 4 — Lazy load, asset cleanup, and measurement:
- Confirm native lazy loading; add a3 Lazy Load if needed; use Asset CleanUp to disable unused scripts on high-traffic pages.
- Run thorough tests: checkout flow, forms, embeds, and mobile experience.
- Compare post-change KPIs: LCP, CLS, conversions, and revenue per visit. Document wins and schedule monthly maintenance.
Rollbacks: keep your backup handy, disable the most recent plugin change if something breaks, and revert one step at a time. Celebrate small wins—if LCP drops by a second and conversions climb, that’s real money saved or earned. Keep a monthly checklist to re-compress new images, run DB cleanups, and review plugin impact. Your next step: pick one plugin from Week 2 and schedule the deployment during a low-traffic hour. Consider this your permission slip to finally make your site faster—and your ROI happier.
References: Google Web Vitals docs (https://web.dev/vitals/), Cloudflare (https://www.cloudflare.com/), Autoptimize plugin (https://wordpress.org/plugins/autoptimize/).