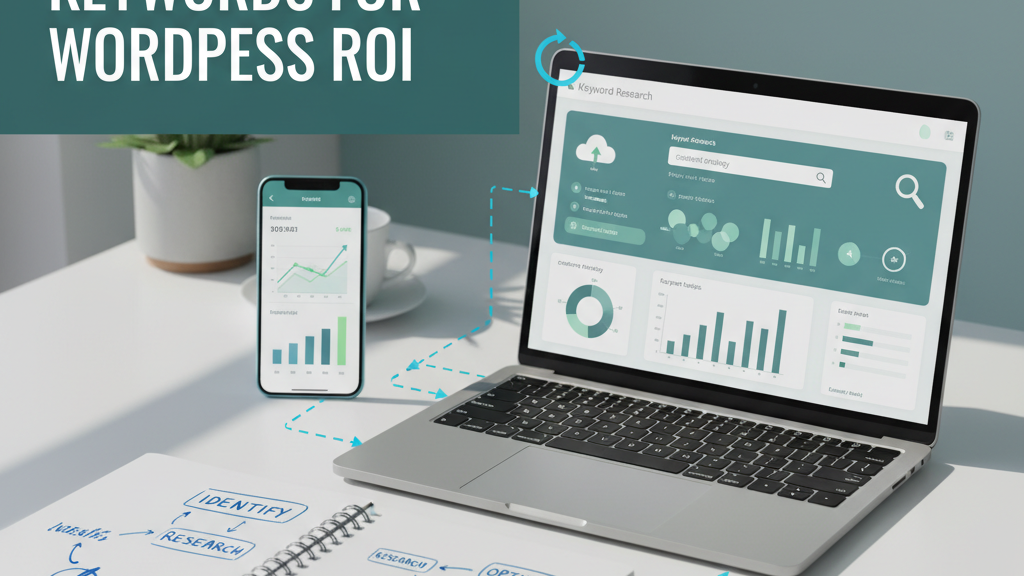
Start with a fast audit and clear goals
30‑minute blog health check — the stuff you can actually finish before lunch: Open Google Search Console and go straight to Coverage (look for errors like 404s, server errors, or “submitted URL marked ‘noindex’”), then run URL Inspection on one or two problem posts. Next, in Search Console open Sitemaps to confirm your sitemap was last read recently and there are no submission errors. In GA4, pull Reports → Acquisition → Traffic acquisition, add a filter Session default channel group = Organic Search and switch the primary dimension to Landing page + query string (this gives you top blog pages by organic sessions). Run PageSpeed Insights at pagespeed.web.dev for a couple of high-traffic posts (mobile and desktop) or open Chrome DevTools → Lighthouse for a local run — note large images, long tasks, and unused JS as quick wins. If you prefer a crawl, use Screaming Frog’s “Internal → Response Codes” to spot sitewide 4xx/5xxs. That’s it — Coverage, Sitemaps, Traffic acquisition (filtered to Organic), URL Inspection, and PageSpeed: five reports you can fetch in half an hour instead of guessing why your posts are ghosting in Google. ⏱️ 11-min read
Pick one realistic KPI and own it: choose either a traffic KPI (organic sessions — e.g., +10% in 90 days) or a revenue KPI (revenue per post — e.g., $X/post). To measure organic sessions by post: GA4 → Reports → Acquisition → Traffic acquisition → filter to Organic Search → primary dimension = Landing page + query string → metric = Sessions. For revenue‑per‑post, open GA4 Explore → Free form, add Rows = Landing page, Metrics = Purchase revenue (or Total revenue), then export and divide revenue by sessions or unique page views to get $/post. Save these views or pin them to a dashboard so you stop checking feelings and start fixing facts. And if you’re automating posting or SEO with tools like Trafficontent’s SEO Optimizer, make sure sitemap auto‑submit is enabled and recheck Search Console after big updates — yes, the internet notices when you tidy up.
Keyword strategy tailored to Shopify blogs
If you want organic traffic that actually pays the rent, split keywords into two bins: transactional/buyer-intent for product pages and informational/long-tail for blog posts and topic clusters. Transactional examples: “buy stainless water bottle,” “best weighted blanket 2025,” “discount [product name],” or “[product] vs [competitor] review.” Blog posts should target longer, curiosity-driven phrases — think “how to stop a leaking water bottle,” “yoga mats for hot yoga,” or “what makes a blanket weighted” — then link those posts to the product pages with clear CTAs. Use Ahrefs or SEMrush to read SERP intent, Google Keyword Planner for volume and CPC signals, and automation tools like Trafficontent’s Auto Blog Writer/Auto Scheduler to scale publishing without turning into a content zombie.
Here’s a quick 5‑step micro-process to pick targets that actually convert:
- Seed and expand — start with product names and competitor terms in Ahrefs/SEMrush to generate buyer-intent and long-tail ideas.
- Check intent — look at the top 10 SERP results: if results are product pages, it’s transactional; if they’re guides and videos, it’s informational.
- Score volume vs intent — use Google Keyword Planner for search volume and CPC; prioritise moderate volume + high commercial intent over huge, vague keywords.
- Map and link — assign transactional keywords to product pages, informational long-tails to blog posts in a topic cluster, and add contextual internal links and a conversion-focused CTA on each post.
- Measure and iterate — track conversions with GA4 and rank/traffic shifts in Ahrefs/SEMrush, then double down on winners and prune losers monthly.
Content templates & AI—how to use both without sounding robotic
Want repeatable templates that don't read like a robot wrote them? Try four reliable scaffolds: a How‑To — hook, 3–7 clear steps, quick screenshots, TL;DR box (800–1,200 words); Product Comparison — short overview, feature table, side‑by‑side pros/cons, final pick and use cases (1,200–1,800 words); Buying Guide — buyer personas, budget tiers, checklist, links to compatible Shopify apps (1,500–2,500 words); Listicle — snappy intro, 6–12 curated items with 2–3 lines each and one image per item (700–1,200 words). For SEO, stick to one primary keyword, use descriptive H2s, add internal links to related product pages, and include a clear CTA or next step for readers who are ready to buy or subscribe.
Use AI for speed but keep humans in charge: generate an outline and first draft with Auto Blog Writer or GPT, then run a second pass with tools like Auto SEO or SEO Optimizer PRO to suggest metadata and schema. After that, a human editor must fact‑check specs against manufacturer pages, add real examples or quotes, tune tone to match your brand voice, and layer in E‑E‑A‑T signals — author bio, source links, dates, and any credentials. For publishing and distribution, let Auto Blog Poster and Auto Scheduler handle the autopilot stuff, but require one final human approval before anything goes live.
Hard rules: always cite primary sources for technical claims, never let AI invent product specs or legal language, and avoid AI‑only content for medical, legal, warranty, or safety statements. Quick editorial checklist before publish: 1) verify 2+ sources for any claim, 2) add an expert quote or first‑hand test, 3) ensure brand voice and readability, 4) run the SEO meta/schema pass, 5) approve distribution via Auto Blog Poster/Auto Scheduler. Think of AI as your clever sous‑chef — fast, helpful, and slightly obsessed with proper grammar — but not the head chef who signs the work or takes responsibility.
On-page SEO specifics for Shopify (titles, meta, images, internal links)
Quick checklist of the exact Shopify fields to edit: in Shopify admin go to Online Store → Blog posts → edit post, then open Edit website SEO to change the Page title (title tag), Meta description, and URL and handle. Image alt text is edited by clicking the image in the post (or in the Media/Files area) and choosing Edit alt text. Use these short copy formulas: for titles try Primary keyword — Benefit | Brand (example: “Easy Shopify SEO — Rank Faster | Trafficontent”), or a how‑to variant like How to [solve X] in [time] — [Brand]. For meta descriptions use Action + keyword + benefit + CTA, keeping it ~120–150 characters (example: “Learn simple Shopify SEO steps to boost organic traffic—follow the 5-minute checklist. Read now.”). Shopify Help has the step‑by‑step if you want the official screenshots.
Image and linking playbook (fast and actionable): compress images with Squoosh or TinyPNG and save as .webp/.jpg, name files with hyphens and a keyword (e.g., blue-linen-shirt-summer.jpg), set social width ~1200px, then add alt text like "blue linen summer shirt - breathable fabric, size M" or "how to set up Shopify blog autopilot - step 1: install Auto Blog Poster". For internal links, put one contextual product link inside the first 200–300 words using a natural anchor (avoid “click here”), add 2–3 product links in a Shop the post block near the end, and always link to the product page or collection (use Shopify's Insert Link → Products to pick exact URLs). If you use Trafficontent tools (Auto Blog Poster / SEO Optimizer PRO), automate meta updates and schedule social posts to save time—think of it as setting your blog on cruise control, not full autopilot like a confused Roomba.
Technical SEO fixes that matter on Shopify
Speed and mobile first: make your blog feel less like dial‑up and more like fiber. Enable lazy‑loading for images (add loading="lazy" or use your theme’s built‑in option), convert images to WebP, serve responsive srcsets, and remove unused app scripts or theme assets — yes, Marie Kondo your theme: if it doesn’t spark clicks, delete it. Defer non‑critical JavaScript and minify CSS/JS; Shopify already serves assets via a CDN, but double‑check any external libraries aren’t pulling you back. Run Google Lighthouse, the Google Mobile‑Friendly Test, and Chrome DevTools performance audits to see real problems and verify fixes.
Fix duplicates and teach Google what you want indexed: use rel="canonical" on posts so collection or product pages don’t steal your blog traffic, or add noindex where appropriate. Add structured data using the Article/BlogPosting JSON‑LD (headline, author, datePublished, image, mainEntityOfPage, publisher) so rich results know what you wrote. Confirm your sitemap at /sitemap.xml and check /robots.txt, then submit the sitemap to Google Search Console — think of it as handing Google the right map to your content. If you want automation, tools like SEO Optimizer PRO or Trafficontent’s Auto SEO can speed checks and fixes so you spend less time tinkering and more time writing stuff AI doesn’t embarrassingly hallucinate about.
Automation tools & safe autopilot workflows
Pair your tooling like a cooking show: use Trafficontent’s Auto Blog Writer to crank out SEO-minded outlines and draft copy, then let Auto Scheduler queue the cadence (think 1 post every 3–7 days, not “blast 20 posts at 2 a.m.”). When it’s time to go live, hit Auto Blog Poster to publish to Shopify or WordPress via the platform APIs, and let Channel Manager syndicate excerpts and auto social media posts to your feeds. For metadata and schema that search engines actually read, run each post through SEO Optimizer PRO to generate titles, meta descriptions, canonical tags and basic structured data—little things that help organic traffic more than yelling into the void. AI gets you a fast, usually solid draft; you stay the editor-in-chief and keep the brand voice honest.
Automation should help, not sabotage. Follow these safety rules as your autopilot checklist:
- Human review gate: every automated draft sits in an editor queue until a person approves tone, facts, and CTAs.
- Plagiarism check: run an original-content scan (built-in or a third-party tool) before publishing.
- Revision history: enable full versioning so you can roll back any rogue AI change.
- Quality thresholds: set length, readability, and keyword-density limits so the writer doesn’t turn into a keyword salad.
- Channel-specific tweaks: let Channel Manager publish snippets, but customize captions per network—what works on Instagram won’t read the same on LinkedIn.
Distribution: auto social, repurposing, and syndication without duplicating SEO
Auto social cadence — set it and forget (mostly). Publish once, promote everywhere without copy-pasting like a robot DJ. Push a punchy opener + image to Twitter/X, a square OG image (1080×1080) to Instagram, a link card (1200×630) to Facebook, and a longer excerpt on LinkedIn. Schedule three micro-snippets: day 0 (launch), day 7 (reminder with a new angle), day 21 (case study or customer quote). Each post should include one clear CTA — Read, Subscribe, or Shop — and one unique image or caption tweak so platforms treat them as fresh. Tools like Auto Blog Poster and Auto Scheduler can automate the cadence and rotate snippets so your socials run like autopilot for your blog without you staring at analytics all night.
Repurpose smart — email and product pages without laziness. Turn the post into a three-email drip: 1) highlight + link, 2) value-add (checklist or mini-guide), 3) product tie-in with a limited offer. For product pages, use a short excerpt plus unique selling details (fit, dimensions, use cases) instead of copying the whole article. If you want variety, have Auto Blog Writer generate alt headlines, short summaries, or bullet takeaways for emails and PDPs so each channel feels native. Yes, AI can speed the draft, but add a human tweak — sound like you, not an algorithmic parrot.
Syndication rules — stretch reach without killing SEO. Don’t let duplicate content eat your rankings. When reposting to partner sites or platforms, insist on a rel="canonical" that points to your original Shopify post, or ask partners to add a noindex meta on their copy. For internal reuse (like product pages), prefer short excerpts plus a canonical link back to the blog or add unique copy on the PDP and use the Channel Manager or SEO Optimizer PRO to enforce canonical/noindex settings. Quick rule: canonicalize or noindex every duplicate. Google Search Central backs this — canonical tags tell search which URL you actually want to rank, and noindex stops unwanted indexation. Do that, and your content will play the field without getting dumped by search engines.
Measure, troubleshoot, and iterate with a 30/60/90 checklist
Think of this as your practical 30/60/90 playbook for Shopify blog success — quick checks you can actually do between coffee breaks. In the first 30 days, run sanity checks: open Google Search Console (coverage, mobile issues), confirm your sitemap and robots.txt in Shopify, skim top posts for click‑through rate dips and fix low CTR titles/meta descriptions. At 60 days, focus on content tweaks: add internal links from high‑traffic posts, A/B test headlines and meta descriptions, refresh underperforming posts with updated data or images, and use tools like Trafficontent Auto Blog Writer + Auto Scheduler to automate re‑publishing the improved versions (works for WordPress autopilot too). By 90 days, run growth experiments: build topic clusters and hub pages, launch one outreach campaign for backlinks, and use an audit tool such as SEO Optimizer PRO or Semrush to measure lift in organic traffic.
Short troubleshooting cheat‑sheet: if traffic suddenly drops, check GSC for manual actions, verify your sitemap and server uptime, and review recent template or plugin changes (yes, that “helpful” app update can break SEO). For crawl errors, inspect canonical tags, fix 404s with 301s, and unblock resources in robots.txt. If duplicate content shows up, set correct canonicals, add noindex to thin tag/category pages, or consolidate similar posts into one stronger article. Use Screaming Frog, Ahrefs, or Trafficontent Auto SEO for diagnostics — then iterate. And remember: AI content can speed drafts and make posts more informative, but always human-edit before publishing (no one likes a robot with no taste).