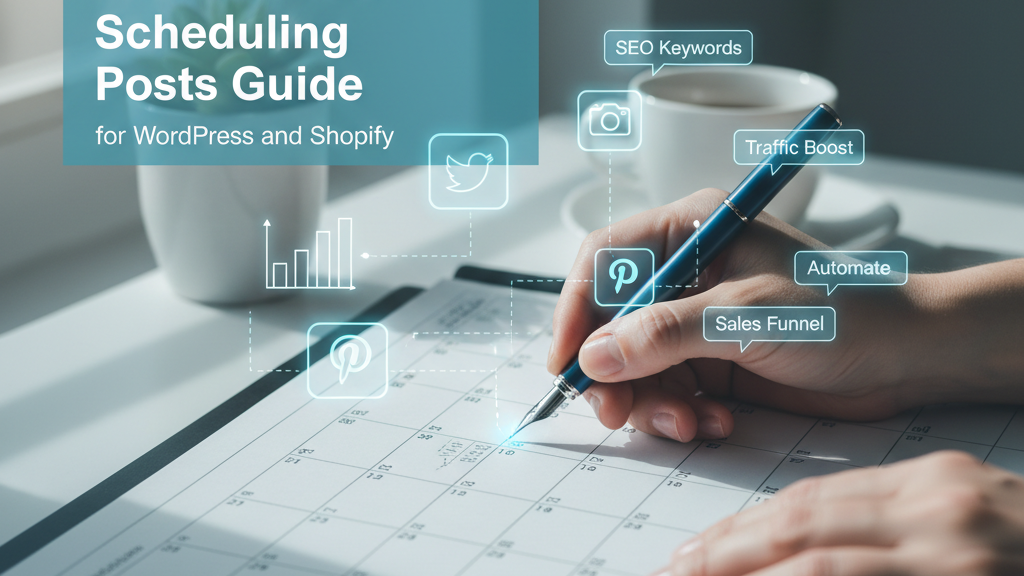
If you run a WordPress-powered content hub alongside a Shopify storefront, coordinating product launches, promotions, and SEO-driven blog posts can quickly become chaotic. Trafficontent’s Scheduling Posts feature gives you a single calendar and automation layer to tame that chaos: queue WordPress posts, link them to Shopify products or collections, and let AI-assisted workflows handle timing, social, and SEO fields. ⏱️ 10-min read
This guide walks you through an automation-first approach. You’ll get practical setup steps, a 2025-ready calendar blueprint, AI-enhanced keyword and template practices for WordPress, multipost social scheduling patterns, measurement tactics to prove impact, and a compact troubleshooting checklist you can use without writing code.
Getting Started: Trafficontent Scheduling Posts for WordPress Stores and Shopify
Scheduling Posts in Trafficontent is the bridge between your editorial calendar and the technical publishing systems on WordPress and Shopify. Think of it as a central control room: editors create content, assign publish dates, attach SEO and campaign metadata, and the calendar handles the rest, showing dependencies and the moment each piece goes live.
Practically, Scheduling Posts sits inside Trafficontent’s Blog Automation suite. It combines three things: a unified calendar view, automation rules for publishing, and integrations to push content to WordPress or surface product-linked content on Shopify. The calendar’s value is most visible when you build campaigns around launch dates—map teaser posts, behind-the-scenes stories, launch-day features, and reminder posts to a single promotion and you’ll see how timing amplifies coverage.
To begin, ensure you have admin-level access on the platforms you plan to connect and a Trafficontent plan that includes scheduling. After you link a store, Trafficontent enumerates the sites and user accounts you can manage, so teams know where they can create, review, and schedule. Typical workflow: draft or import content into Trafficontent, pick a publish window, fill SEO fields and product mappings, add social or newsletter channels, then schedule—or enable auto-publish and let the calendar do the work.
Connect Shopify to Trafficontent and Enable Auto-Publishing
Connecting Shopify unlocks the most useful automation: linking blog content to product pages and pushing timing to your storefront. Trafficontent supports both OAuth and API key connections; choose whichever matches your security policy. The flow is straightforward—select Shopify in the Trafficontent dashboard, complete the OAuth handshake or paste a scoped API key, and confirm the required scopes for publishing and catalog reading.
Key configuration items to check during connection:
- Authentication method (OAuth for most stores; API key if using private apps)
- Required scopes: write access for blog posts, read access for product and collection metadata
- Role and permissions: typically an Admin account or a staff role with full publish rights
Once connected, enable Auto-Publishing in Trafficontent’s Auto-Publishing panel. Practical settings to set immediately:
- Time zone: align with your store’s local time to prevent off-hour launches.
- Publish windows: set daily windows (for example, 9:00–17:00) and a maximum posts-per-day cap to avoid spamming.
- Retry policy: configure retry attempts and backoff rules for temporary API failures.
Product linking is essential: use the mapping field in Trafficontent’s post editor to associate a blog post with a specific Shopify product, collection, or tag. That mapping improves cross-navigation and contextual relevance on product pages while ensuring your blog content and storefront messaging remain synchronized. Trafficontent will handle drafts and approvals—failed publishes remain in the queue for review, and you can set content statuses (Draft → In Review → Scheduled → Published) to keep human checks where you need them.
Build an SEO-Driven Content Calendar for 2025
A calendar without strategy is just a list. For 2025, design a calendar that places SEO and product timing at the center. Start by defining 4–6 content pillars that match your product lines and seasonal demand—examples: “Everyday Essentials,” “Gift Guides,” “Seasonal Collections,” “How-to & Care,” plus campaign pillars like Black Friday and back-to-school. Each pillar should map to a measurable objective: traffic growth, list signups, or revenue lift.
Next, map campaigns by quarter. Use the following approach:
- Quarter planning: identify product launches and promotional windows—e.g., Spring collection in Q2, Back-to-school in Q3, Holiday in Q4.
- Content cadence: aim for 2–3 blog posts per week, with 1–2 social updates per platform; reserve a 3–4 day buffer for review and QA.
- Campaign sequencing: one teaser post four weeks out, product spotlight one week before launch, launch-day post synchronized with Shopify, and two reminder posts at week+1 and week+3 to capture late interest.
Tie SEO into the calendar: for each content slot assign a target keyword (or long-tail phrase) and intent (informational, commercial, navigational). Trafficontent’s AI can help generate keyword ideas from seed terms—use this to populate briefs with title options, meta descriptions, recommended headers, and internal-link suggestions that point back to product pages. Use tags on the calendar to track dependencies—“launch,” “email,” “paid,” “social”—so you can filter the calendar and export only what a channel owner needs.
The editorial brief should be standard: objective, audience, primary keyword, secondary keywords, CTA, required product mappings, images, and a checklist for SEO and accessibility. When everything is captured in Trafficontent, scheduling is a matter of assigning publish times and letting the automation queue it into WordPress and your social channels.
AI-Enhanced Keyword Research and WordPress SEO Templates
AI accelerates keyword discovery, but human judgment still decides which terms align with business goals. A practical workflow blends both: use AI to expand seed terms into long-tail variations and question-based queries, then filter by relevance, search intent, and conversion potential.
Concrete workflow:
- Seed: pick 5–10 core product or category terms (e.g., “waterproof trail jacket,” “breathable runners”).
- Expand: use Trafficontent’s AI to generate long-tail variants, related questions, and intent modifiers (e.g., “best waterproof trail jacket for winter hiking”).
- Group & score: cluster by intent and estimate opportunity (search volume vs ranking difficulty) using internal tools or keyword metrics from your usual SEO suite.
- Lock targets: choose 1 primary and 2–3 secondary keywords per post.
Then apply WordPress SEO templates. Build reusable templates for common post types—product spotlight, how-to, comparison, round-up—mapping SEO fields to structure:
- Title: ~50–60 characters, include primary keyword early.
- Meta description: 140–160 characters, clear benefit + CTA.
- Slug: short, keyword-focused, no stop-words.
- H1: mirrors title but may be longer for readability.
- H2s: break the topic into user-intent sections; include synonyms or related phrases.
- Schema: BlogPosting with author, publish date, and linked product metadata for rich results.
Trafficontent can auto-fill these templates into new drafts: when you select a template, the title, meta, slug, H1, and suggested H2s populate the post editor. That keeps team output consistent and lifts the tedious work from writers. Provide brief writer prompts in the template: recommended word counts, required internal links (e.g., link to the 3 priority product pages), and image specs (ratios and ALT text guidance).
One last tip: keep template fields editable and versioned. SEO best practices shift; when you update a template, reapply only when you review the content so you don’t overwrite hand-tuned copy.
Automating Social Posts and Multipost Scheduling for Shopify
Social amplifies blog-driven product launches—Trafficontent lets you push a single article to multiple networks with channel-specific tweaks. Start by connecting your social channels in Trafficontent and verifying posting permissions; OAuth tokens need to be refreshed periodically, so use page-level access for Facebook and profile-level tokens for Instagram and X/Twitter where supported.
Create multipost rules that map core assets (title, body excerpt, images) to different channel formats:
- Core caption: the short headline + CTA.
- Network tweaks: add hashtags for Instagram, thread-friendly bullets for X, and link-previews for Facebook and LinkedIn.
- Media handling: crop or supply alternate images per network resolution requirements.
Scheduling patterns to adopt:
- Campaign mode: schedule time-bound posts (teaser, launch-day, reminder) that align with product windows.
- Evergreen mode: deploy recurring posts (weekly or monthly) for durable content—Trafficontent can repeat posts at set intervals, keeping your feed alive without manual reposting.
- Approval queues: preview across networks, review in a staging view, then approve and let the queue publish automatically.
Best practices for cross-posting:
- Don’t “one caption fits all.” Use multipost rules to craft network-appropriate messaging while keeping the core narrative consistent.
- Use UTM tags in links so social-sent traffic is traceable to the calendar slot and campaign.
- Reserve platform-specific calls-to-action—use Instagram for lifestyle storytelling and X for quick launch updates or limited-time codes.
When properly configured, a single scheduled post in Trafficontent creates a synchronized social rollout across platforms while preserving the unique voice each channel expects—saving teams hours every week.
Measuring Impact: Tracking SEO and Traffic Across WordPress and Shopify
Measurement converts effort into learning. Begin with objectives that tie content to business outcomes—traffic growth, engagement, product page conversions, or revenue-per-visit. Match each objective to sensible KPIs.
Common KPIs by channel:
- Organic search: impressions, clicks, and keyword rankings (Search Console + Trafficontent ranking data).
- On-site engagement: pageviews, time-on-page, bounce rate, and scroll depth (Google Analytics).
- E-commerce impact: add-to-cart rate, conversion rate, and revenue-per-visit (Shopify + Analytics).
- Social performance: clicks, CTR, and assisted conversions via UTM-tracked posts.
Data sources and attribution:
- Combine Google Analytics, Search Console, Shopify’s reports, and Trafficontent’s internal metrics to triangulate performance.
- Use UTM parameters for every campaign link and set a standard naming convention so reports are consistent and filterable.
- Enable cross-domain tracking if your blog and store use different domains or subdomains so sessions aren’t split across tools.
Operationalize measurement with dashboards: build weekly overviews highlighting trends—top-performing keywords, best-converting posts, and any publish failures that caused unexpected gaps. Adjust the calendar based on these signals: if posts tied to a product launch consistently underperform in conversions, reassess intent mapping (are you targeting informational rather than transactional queries?) and iterate on CTAs and internal links to product pages.
Finally, review automated publishing logs regularly. A failed publish that goes unnoticed for a campaign week is a missed opportunity. Schedule a weekly calendar audit to catch backlogs or API rate limits before they affect the next launch.
Best Practices, Checklists, and Troubleshooting
This section collects practical checklists and quick fixes you can use right away—no developer required.
Shopify + WordPress SEO Checklist (quick)
- Meta title: 50–60 characters with primary keyword near front.
- Meta description: 140–160 characters, benefits-first, include CTA.
- Slug: short and descriptive; remove stop words.
- H1/H2s: H1 mirrors title; H2s reflect user questions or product features.
- Product mapping: link to 1–3 related products, include collection or tag where relevant.
- Alt text: descriptive, includes keyword where natural.
- Schema: BlogPosting/Article and Product snippets verified via Rich Results Test.
WordPress SEO Keyword Generator Workflow
- Collect seed terms from product catalog and customer FAQs.
- Use Trafficontent AI to expand into 20–30 long-tail variants.
- Group by intent and filter for relevance.
- Assign 1 primary + up to 3 secondary keywords per post and create a template for each.
Troubleshooting: Common Issues & How to Resolve Them
If a scheduled post doesn't publish:
- Verify connection: re-authenticate WordPress or Shopify in Trafficontent and check OAuth scopes (read vs write).
- Check publish window and time zone: confirm the scheduled time aligns with the site clock and queue status.
- Inspect approval status: ensure the post is not stuck in “In Review.”
- Look for API rate limits: if you have many posts queued, reduce the daily cap or stagger publish times.
If templates or fields are missing:
- Re-sync the Template Library and confirm template IDs match the ones attached to drafts.
- Check required fields like featured image, excerpt, and required schema attributes.
Analytics gaps:
- Confirm tracking IDs are present in both WordPress and Shopify; validate that UTM parameters are applied to campaign links.
- Review filters in Analytics that might exclude internal traffic or bots.
When in doubt, use Trafficontent logs (Settings > Logs) to view API responses and error messages. The logs will usually point to a permission issue, expired token, or network error; re-authenticating or increasing retry attempts often fixes transient problems. If a problem persists, reach out to Trafficontent support with a log excerpt and the failed post ID for faster resolution.
Quick operational tip: maintain a concise changelog inside Trafficontent for each post—who approved, when media were updated, and any promo codes applied. That makes audits and rollback safer and faster.
Takeaway: Start small—sync a single content pillar and one Shopify collection, automate the rest, measure results, then scale. With scheduling, mapping, and consistent templates in place, the time you free up lets you focus on the ideas that actually move the needle. Your next step: connect a store, draft a linked post, and schedule a test publish to confirm the full end-to-end flow.