Publishing faster doesn’t mean sacrificing craft. Over the last few years I’ve moved from staring at blank pages to turning out reliable, polished posts on a predictable schedule — and the secret wasn’t caffeine (though there was plenty of that). It was a repeatable post-template system in WordPress that cuts decision fatigue, protects voice, and makes publishing feel less like improv and more like a well-rehearsed set. ⏱️ 11-min read
In this guide I'll walk you through why templates matter, what belongs in them, how to store and reuse them in WordPress, and a practical, step-by-step playbook you can start using today. Expect real-world examples, small hacks that save minutes that add up to hours, and a few sarcastic asides because if the web didn’t need humor it would be a corporate PDF.
Why WordPress post templates speed publishing and ensure a consistent style
Think of a post template as your blog’s setlist. When I switched to templates, it felt like going from winging a solo to playing in a tight trio — everyone knows their part and the tune actually sounds good. Templates reduce the number of choices you make per post: title format, image placement, header structure, meta fields — consider half your publishing anxiety solved before you open the editor.
Templates also act as a forced-but-friendly style guide. For small teams and solo bloggers alike, that means the tone, CTA placement, and even the micro-copies (like author bylines or featured image captions) stay consistent. You avoid the "this one’s different" syndrome — the web equivalent of showing up to a wedding in sneakers when everyone else is in tuxedos. Templates lower error rates by inserting placeholders for author, date, canonical links, and SEO fields. A preflight checklist inside the template flags missing pieces so you don’t hit Publish and have to do crisis PR at 9pm.
Finally, templates scale. Assign templates to topics or writers, and you get predictable output without policing every comma. It’s not a brittle script — it’s a reliable framework that lets creativity flourish within guardrails. Like a good espresso, it concentrates the essentials and leaves the jittery excess at home.
Core elements of a reusable post template
When I design a template, I treat it like a recipe card: exactly what you need and nothing that makes you sift through a novel. Every reusable post template should include a few non-negotiables that handle structure, voice, and SEO at once.
- Title formula & slug — Aim for ~60–70 characters in the title and a URL-friendly slug that mirrors it. A title formula like “How to [ACTION] in [TIMEFRAME] — [BENEFIT]” gives consistency without sounding robotic.
- Meta description — A 150–160 character template with the focus keyword near the start. This saves time and nudges writers to summarize the value up front.
- H1–H3 structure — Fix a predictable hierarchy: H1 (page title), H2s for major sections, H3s for steps or subpoints. Enforced heading order helps accessibility and SEO (yes, search engines are picky roommates).
- Intro with a hook — First sentence template: identify the pain, promise a result. This prevents the classic meandering intro that reads like a diary entry.
- Body pattern — Decide the common flow: Problem→Solution→Steps→Examples→Takeaway. Use numbered steps or bullets for scannability.
- CTA block — A short, consistent call-to-action: subscribe, download, or contact. Drop it at the end and optionally after the second H2.
- Media & alt text — Placeholder for hero image and image guidelines. Provide an alt-text formula like “[PRODUCT] — [COLOR] — [KEY FEATURE]”.
- Internal links & schema — Slots for 2–3 internal links and optional FAQ/schema block when relevant.
Templates should include a few accessibility prompts too: heading order, alt text instructions, and reminders to keep contrast and keyboard navigability in mind. In short: a template is the skeleton that tells authors where to put the good stuff, and where to stop tinkering.
Template formats and storage options for WordPress
WordPress gives you several places to park your templates — pick the one that matches your comfort level and workflow. I’ve used them all, so here’s what works and when.
Gutenberg block templates and template parts are the easiest place to start. Build the layout in the block editor, save header/hero/footer sections as template parts, and reuse them across posts. It’s like saving a sandwich with the exact spread so you don’t end up with mustard-only mornings.
Reusable blocks and block patterns are your express lane. Save the author bio, product card, or CTA block as reusable so you can insert them with two clicks. Block patterns are pre-configured groups of blocks — handy when you want a full “Product spotlight” section to drop in without fiddling with padding and typography. These live in the editor and are accessible to any user with editing rights.
Full-site editing (FSE) with block themes lets you control templates site-wide through the Site Editor. FSE is excellent if you want visual consistency across post types; change a template part once and it propagates throughout the site. Traditional theme templates (PHP files) still exist and are fine for developers, but FSE gives non-coders more power. If your site isn’t ready for FSE, store canonical templates in a shared Google Doc or a knowledge base, then mirror them as reusable blocks.
Storage tip: maintain a single source of truth. Whether it’s the Site Editor, a “Patterns” library, or a Notion doc with copy examples, consistent storage prevents the “which version is the real one?” debate — which nobody enjoys, except maybe spreadsheet aficionados.
Step-by-step guide to creating a templated post
Here’s a practical workflow I use when I need to turn an idea into a publishable post in under two hours. It’s not magic — it’s habit plus templates — and it scales whether you’re solo or running a small team.
- Define the post type and objective — Is this a how-to, roundup, or case study? Who’s reading and what action do you want? Write a one-sentence objective (e.g., “Teach readers to set up X so they can save Y hours”).
- Apply the template — Insert the saved block pattern or reusable template. The structure and placeholders are now in place.
- Draft using prompts — Fill placeholders: {{HOOK}}, {{STEP_1}}, {{CTA_LINK}}. Use focused prompts to keep sentences tight. I often write the hook first, then the takeaway last — it keeps the middle from wandering off to a coffee shop.
- Quick SEO and readability pass — Run Yoast or Rank Math checks: target keyword present, meta length, and a green readability score if possible. Aim for short paragraphs and subheads every 150–250 words for scannability.
- Add media — Drop in the hero image, fill alt text using your alt-text formula, and include 1–2 inline images or screenshots if it’s a tutorial.
- Internal links & finalize schema — Add 2 internal links with descriptive anchor text and enable FAQ schema if applicable.
- Final checklist — Ensure H1 is set, focus keyword is in the title and first paragraph, meta description is filled, and CTA link works. Then publish or schedule.
When you repeat this process, the time from idea to publish compresses. Templates are the conveyor belt; your edits are the final polish. And yes, if you like the thrill of chaos, you can still freestyle — but templates keep the ship from colliding with an iceberg of missed metadata.
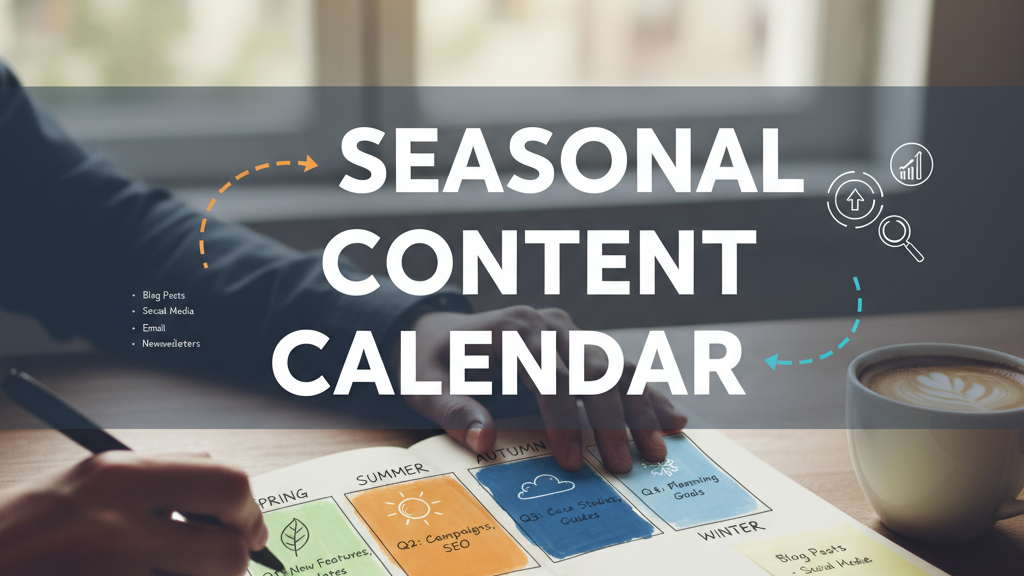
Planning with a template-driven content calendar
A content calendar with templates is like a symphony score: every musician knows when to come in and what to play. I map topics to template types so each entry starts with the right skeleton.
Start by grouping your content into a few template buckets — for example: how-to, list, roundup, and case study. Assign a template to each bucket and use those templates as the default for any topic in that category. When I plan a month, I allocate at least one how-to, one case study, and one roundup — variety keeps readers interested and your internal links tidy.
Next, pair templates with keyword clusters. A template for “how-to” posts might include prompts for primary and secondary keywords, while a case study template asks for measurable outcomes (percent improvement, time saved). If you’re using a platform like Trafficontent you can attach templates to themes and auto-populate briefs, but you don’t need fancy tools — a spreadsheet works fine. Columns: publish date, template type, target keyword, assigned writer, draft due, review due, publish date.
Finally, reserve reusable blocks for recurring elements: author bios, product boxes, and newsletter signups. That means when you hit a slot on the calendar, much of the post is already scaffolded. Put review checkpoints in the calendar — a draft check and a final QA — to avoid 11th-hour chaos. The result is predictable cadence, faster turnarounds, and fewer “where’s that image again?” Slack messages at 4 p.m.
SEO and readability built into templates
Your template should do a lot of the SEO thinking for you. I treat templates like a GPS for search engines and busy readers: directions you don’t have to rewrite each time.
First, pre-fill meta fields. Templates should include a meta description slot with a character guide (150–160 chars) and a reminder to place the focus keyword near the start. Include a canonical URL field if you ever repurpose content — it prevents duplicate content headaches. Use an alt-text formula for images so they’re not invisible to search engines: “[PRODUCT] — [FEATURE] — [USE CASE]”.
Second, enforce a header hierarchy. A consistent H1/H2/H3 pattern helps crawlers and readers. Templates can also include prompts for internal linking: “Add at least 2 internal links to category pages or related posts — use descriptive anchor text.” That prevents lazy “click here” anchors and improves site architecture. Templates can cap suggested internal links to avoid overlinking (more is not always better; you’re not trying to knit an inter-site sweater).
Readability is equally important. Templates should nudge toward a Flesch Reading Ease in the 60–70 range and recommend sentence lengths under ~20 words on average. Include blocks for bullets and numbered steps — these are readability gold. Finally, consider optional FAQ blocks that map directly to schema markup; FAQ answers can boost SERP real estate when implemented correctly. For technical reference on structured data and SEO best practices, check Google’s structured data documentation and the WordPress SEO plugin guides from Yoast.
Tools, plugins, and automation to scale fast
You don’t need an enterprise stack to make templates work — a few smart tools will do most of the heavy lifting. I keep a minimal toolkit that reliably moves drafts through the pipeline without turning the site into a plugin graveyard.
Start with Gutenberg: block patterns and reusable blocks are free and built-in. For custom fields and more rigid templates, Advanced Custom Fields (ACF) Pro is worth the small investment — it lets you define fields like “Product Specs” or “Client Quote” that writers simply fill in. For SEO, Yoast SEO and Rank Math are both solid; they automate meta fields, canonical tags, and give you quick readability nudges. If you want structured content to auto-populate, Trafficontent (if available to you) can generate SEO-optimized briefs and drafts tied to templates, saving time on ideation and first drafts.
Automation via Zapier or Make can create drafts from forms, apply a template pattern, and notify the team. Use WP-CLI or scheduled cron tasks to handle bulk changes like updating a CTA across many posts. But be careful: automation is like a Roomba — delightful until it swallows a sock. Keep controls and manual QA checkpoints.
Finally, maintain plugin hygiene: fewer, well-chosen plugins reduce conflicts and site bloat. When I audit sites I usually remove redundant plugins and consolidate onto one SEO solution and one custom-fields tool. You’ll publish faster and your site will thank you by not breaking during lunch hour.
Templates in action: examples and inspiration for various post types
Okay — show me the templates. Below are practical setups I use for common post types. Each is intentionally minimal so writers can fill content without guessing the structure.
Tutorial (How-to)
- Title formula: How to [Do X] in [Timeframe] — [Benefit]
- Intro: Hook + promise + prerequisites list
- Steps: Numbered 3–7 steps with screenshots (use hero image + inline images)
- Recap: Key takeaways and troubleshooting tips
- CTA: Download checklist or subscribe
List post
- Title: [Number] Best [Topic] for [Audience] in [Year]
- Intro: why the list exists and how to use it
- List items: each with short description, pros/cons, and 1 image
- Conclusion: top pick + CTA to product/category
Product roundup
- Title: [Category] — Compared: [Number] Options for [Use Case]
- Template sections: product card (image, short bullets, price, link), comparison table, winner summary
- SEO: canonical if affiliate content duplicates elsewhere
Case study
- Problem statement
- Approach: steps taken
- Results: metrics, chart, client quote
- Lessons learned and CTA to contact/schedule demo
Tweaks by niche are small: for food blogs add nutrition facts block; for SaaS blogs include a feature callout; for local businesses add location schema. These templates make writing feel less like a staring contest and more like filling in a proven form — much less thrilling on paper, but also far more effective in the wild.
Ready to try it? Pick one template, turn it into a block pattern or reusable block, and publish your next post from it. If you need a starter pack, begin with a how-to and a case study template — they’ll cover most scenarios and make your editorial calendar much easier to manage.
Reference links: WordPress Block Editor Handbook — https://developer.wordpress.org/block-editor/ , Google Structured Data — https://developers.google.com/search/docs/advanced/structured-data/intro , Yoast SEO basics — https://yoast.com/wordpress/plugins/seo/