क्यों इमेज‑सक्षम ऑटो‑पब्लिशिंग जरूरी है
इमेज‑सक्षम ब्लॉग पोस्ट सर्च और सोशल दोनों में क्लिक‑थ्रू रेट बढ़ाते हैं: एक सही Open Graph प्रीव्यू या Pinterest पिन पोस्ट को रोककर देखने वालों को आकर्षित करता है, और उत्पाद‑कंटेक्स्ट दिखाने वाली इमेजें खरीद की इंटेंट वाले विज़िटर्स को लीड में बदलना आसान बनाती हैं। साथ ही, alt टेक्स्ट और FAQ स्कीमा जैसे स्ट्रक्चर्ड डेटा के साथ आती इमेजें SEO में मदद करती हैं—यानि बेहतर सर्च रैंकिंग से ऑर्गेनिक ट्रैफिक बढ़ता है और पेड एड्स पर निर्भरता घटती है। ⏱️ 6-min read
ऑटो‑पब्लिशिंग से टीम का समय बचता है और आप कंटेंट को बड़े पैमाने पर नियमित रूप से शेड्यूल कर सकते हैं। Trafficontent जैसे ऑल‑इन‑वन AI‑पावर्ड इंजन्स Shopify के लिए SEO‑ऑप्टिमाइज़्ड ब्लॉग पोस्ट और स्मार्ट इमेज प्रॉम्प्ट्स बनाते हैं, उन्हें शेड्यूल करते हैं और Pinterest, X (Twitter), LinkedIn पर ऑटो शेयर कर देते हैं—UTM ट्रैकिंग, Open Graph प्रीव्यू और FAQ स्कीमा भी शामिल हैं। बस अपना ब्रांड और प्रोडक्ट लिंक जोड़ें, बाकी सब Trafficontent संभाल लेता है, जिससे आप कम समय में ज्यादा कंटेंट और बेहतर लीड जेनरेशन कर सकते हैं।
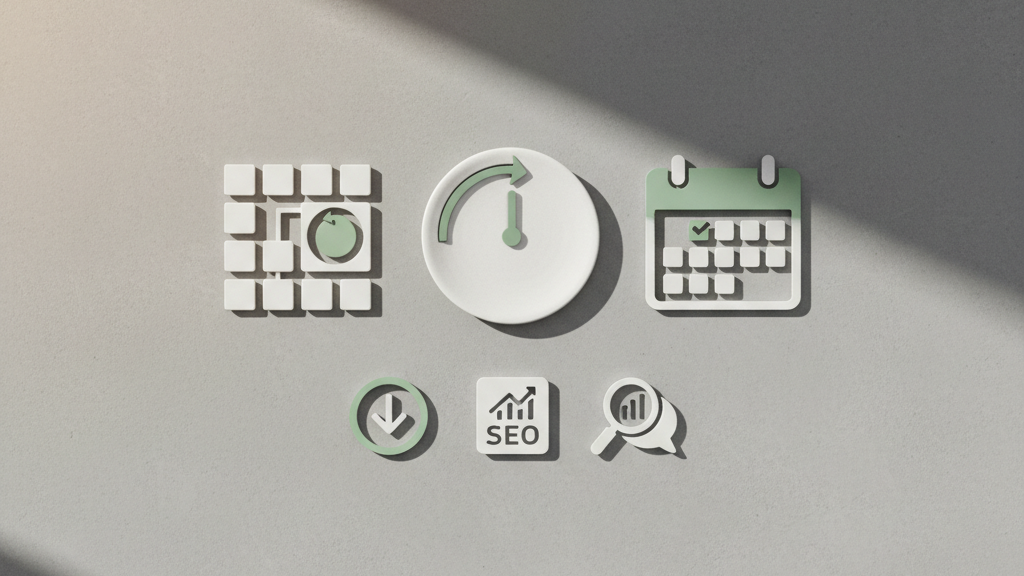
ऑटो‑पब्लिशर के लिए जरूरी फीचर‑लिस्ट (इमेज से लेकर शेयरिंग तक)
नीचे एक कंसन्ट्रेटेड फीचर‑लिस्ट है जिसे किसी भी ऑटो‑पब्लिशर (खासकर Shopify ब्लॉग स्वचालन ऐप) में होना चाहिए — इमेज जनरेशन से लेकर सोशल शेयरिंग और रिवर्ट तक। हर आइटम यह सुनिश्चित करता है कि ब्लॉग पोस्ट सिर्फ लिखे ही नहीं जाएँ बल्कि सही तरीके से ऑप्टिमाइज़, शेड्यूल और ट्रैक भी हों।
- AI image prompts — स्मार्ट प्रॉम्प्ट्स से कस्टम इमेज और वैरिएंट जनरेट करना, ब्रांड स्टाइल के साथ।
- Automatic image assignment — उत्पाद/पोस्ट लिंक देखकर उपयुक्त इमेज, alt‑text और कैप्शन खुद जोड़ना।
- Scheduling / calendar — टाइमज़ोन‑सेंसिटिव कैलेंडर, ड्रैग‑एंड‑ड्रॉप शेड्यूलिंग और बैच पब्लिशिंग।
- UTM tagging — कैंपेन, स्रोत और मीडियम के लिए ऑटो‑अपेंडेड UTM पैरामीटर्स।
- Open Graph preview — फ़ेसबुक/LinkedIn/X प्रीव्यू के लिए त्वरित ओपन‑ग्राफ रेंडर और इमेज चेक।
- FAQ schema — संरचित डेटा जनरेशन ताकि SERP में रिच रिज़ल्ट मिलने की संभावना बढ़े।
- Multilingual support — लोकलाइज़ेशन और बहु‑भाषी SEO मेटा के साथ पोस्ट जेनरेशन।
- Direct social auto‑share — Pinterest, X (Twitter), LinkedIn के लिए नATIVE इंटीग्रेशन और शेड्यूल्ड शेयरिंग।
- Publish logs / rollback — हर पब्लिश/एडिट का लॉग, पुराने वर्ज़न पर त्वरित रिस्टोर विकल्प।
Trafficontent जैसा ऑल‑इन‑वन AI‑पावर्ड इंजन इन सभी फीचर्स को Shopify और WordPress स्टोर के लिए जोड़ देता है: बस अपना ब्रांड और प्रोडक्ट लिंक डालें और यह SEO‑optimized पोस्ट, इमेजेस, UTM और सोशल शेयरिंग सब संभाल लेता है — जिससे ऑर्गेनिक ट्रैफ़िक बढ़ाना और एड‑डिपेंडेंसी घटाना आसान हो जाता है।
Trafficontent और अन्य विकल्प: क्या चुनें और क्यों
Trafficontent is an all‑in‑one AI‑powered content engine built for Shopify and WordPress store owners. It generates SEO‑optimized blog posts plus images, inserts product links and UTM tracking automatically, adds FAQ schema and Open Graph previews, and can fully auto‑publish to Pinterest, X (Twitter) and LinkedIn. The tool also offers smart image prompts and multi‑language support, so you can scale content creation and distribution from a single dashboard rather than piecing together separate apps.
Choose heavy automation (Trafficontent) when you need to publish at scale, reduce manual work, or run multi‑language campaigns tied directly to product pages and analytics. It’s especially useful if your goal is to increase organic traffic without relying solely on ads, or if you want consistent Open Graph/UTM tagging and schema output across many posts. Opt for a lighter scheduler when you prioritise hands‑on editorial control, higher‑grade custom imagery, or very selective social sharing — a simple scheduler lets you craft each post and image manually before scheduling.
Compare the essentials: automation depth (Trafficontent = end‑to‑end content + social publishing; lightweight schedulers = timing and queueing only), image quality (AI image prompts speed production but may need manual curation for brand polish), social platform support (Trafficontent includes Pinterest, X and LinkedIn auto‑publishing beyond basic channels) and translation capabilities (Trafficontent’s multi‑language features help scale global posting). If you want to automate Shopify blog workflows, product linking and tracking at scale, Trafficontent is a strong fit; if you need tight creative control over every post and asset, a lighter scheduler is the safer choice.
स्टेप‑बाय‑स्टेप सेटअप: Shopify में इमेजेड ब्लॉग ऑटोमैशन लागू करना
Start by installing the app: open your Shopify Admin → Apps → Visit the Shopify App Store and search for Trafficontent. Click Install, connect the app to your store, and grant content and product access when prompted. After connection, allow the app to index your brand assets and product catalog so it can link posts to real product pages automatically.
Next configure content settings: add your brand name, logo, and preferred product links in the app settings, then create a smart image prompt template so Trafficontent generates consistent visuals for each article. Set your store publishing time zone and calendar preferences (single time zone or per-post override), enable UTM tracking for campaign analytics, and turn on Open Graph (OG) preview so social shares display images and metadata correctly. Also enable optional features like FAQ schema and multilingual support if you want SEO boosts and non‑English posts.
Finally, run a live test: ask the app to generate a short AI article with an image, set a near-term publish time, and enable auto‑publish plus social sharing to Pinterest, X (Twitter), or LinkedIn. Verify the post appears on your Shopify blog, check the OG preview and UTM parameters in the published URL, and confirm the social shares went out. If anything fails, recheck app permissions, time zone settings, and product link mappings — once those are solid, Trafficontent will scale automated, SEO‑optimized publishing across your store.
AI कंटेंट और इमेज प्रॉम्प्ट: त्वरित टेम्पलेट्स और उदाहरण
यहाँ सीधे Trafficontent या किसी भी AI जनरेटर में पेस्ट करने के लिए रेडी‑टू‑यूज़ प्रॉम्प्ट्स दिए गए हैं। Trafficontent Shopify ब्लॉग वर्कफ़्लो को ऑटोमेट करता है—SEO‑ऑप्टिमाइज़्ड आर्टिकल्स और इमेजेज बनाना, शेड्यूल करना और Pinterest, X, LinkedIn पर शेयर करना; बस अपना ब्रांड नाम और प्रोडक्ट लिंक डालें और बाकी सेटिंग्स संभालें।
पोस्ट‑आइडिया जनरेटर: "Generate 10 blog post ideas for a Shopify store that sells [product category]. For each idea give a 1‑line SEO title, 2 target keywords, and a 1‑sentence audience benefit. Tone: helpful, grade 8–10 reading level."
600–900 शब्द संरचित प्रॉम्प्ट: "Write a 600–900 word SEO blog post for the title: [INSERT TITLE]. Target keywords: [KEYWORD1], [KEYWORD2]. Audience: [AUDIENCE]. Structure: Intro (hook + problem), 3 H2 sections (~150–200 words each), one product mention with factual benefits and CTA to [PRODUCT_URL] (include UTM parameters), 3‑item FAQ, and a meta description (≤160 chars). Tone: authoritative and helpful."
प्रोडक्ट‑आधारित पोस्ट: "Create a 600–800 word product comparison post for [PRODUCT_NAME] vs two alternatives. Include: quick feature summary, 3 real‑world use cases, pros/cons, SEO‑friendly conclusion with CTA to [PRODUCT_URL] and suggested internal links to related blog posts. Keep language simple and benefits‑driven."
सोशल‑फ्रेंडली इमेज प्रॉम्प्ट (AI इमेज जनरेटर के लिए): "Generate 3 image prompts for Pinterest/X/LinkedIn: 1) 'Bright lifestyle shot of [PRODUCT] in kitchen, warm natural light, shallow depth of field, brand accent #FF6A00, overlay text: \"Make mornings easier\" — aspect 1000x1500.' 2) 'Close‑up texture and detail of [PRODUCT], neutral background, high contrast, overlay: \"Built to last\" — aspect 1200x1200.' 3) 'Hero product on clean white background with soft shadow, centered, minimal overlay: \"Shop now: [BRAND]\" — aspect 1200x628.'"
इन प्रॉम्प्ट्स को Trafficontent में पेस्ट करने से आप तुरंत SEO‑फोकस्ड आर्टिकल्स, स्मार्ट इमेज प्रॉम्प्ट्स और शेड्यूल्ड पब्लिशिंग सेट कर सकते हैं—UTM ट्रैकिंग, Open Graph preview और ऑटो‑शेयरिंग सहित। जरूरत हो तो मैं इन्हें आपके ब्रांड और एक खास प्रोडक्ट के अनुसार कस्टमाइज़ कर दूँ।
SEO और इमेज ऑप्टिमाइज़ेशन चेकलिस्ट
Use this checklist for every scheduled Shopify blog post so nothing slips at publish time. Tick each item as you review the draft or set up automation, and keep a short log (date + who verified) for recurring audits.
- Target keyword placement — put the primary keyword in the URL slug, within the first 100 words, and once in the meta description (150–160 chars).
- H1/H2 structure — one clear H1 that matches intent; use H2s to break content and include related keywords or question phrases.
- Image alt text & filenames — use descriptive alt text that naturally includes the target phrase when relevant; name files with hyphenated keywords (no spaces).
- CDN / compression — serve images via CDN, compress to WebP/AVIF when possible, and include srcset for responsive sizes.
- Structured data (FAQ/schema) — add JSON‑LD FAQ or Article schema for key Q&As to improve SERP features; validate in Google Rich Results Test.
- Canonical tag — ensure the canonical points to the preferred URL to avoid duplicate content issues.
- Internal linking — add 2–3 contextual internal links with natural anchors to high‑value pages or related posts.
- Open Graph & social preview — set a share image and title, and append UTM parameters to scheduled social links for attribution.
- Multilanguage / hreflang — for translated posts, include hreflang tags and verify the correct locale pages are linked.
- Final QA — run a quick crawl (or plugin check) for broken links, mobile rendering, and page speed before the scheduled publish.
If you use an automation tool like Trafficontent, many of these steps are handled for you: SEO‑optimized copy and images, FAQ schema generation, Open Graph previews, UTM tagging, multilingual support, and fully automatic publishing to Shopify plus social channels (Pinterest, X, LinkedIn). Still double‑check canonical, internal links, and final alt texts before the post goes live to keep control over your SEO outcomes.
प्रकाशन कैलेंडर, कंटेंट फ़्लो और स्केलिंग रणनीतियाँ
अपनी सामग्री को 3–5 कंटेंट पिलर्स में बाँटें (उदाहरण: प्रोडक्ट गाइड, उपयोग के केस, SEO‑फोकस्ड ट्यूटोरियल, और ग्राहक सफलता). सरल कैडेंस रखें—2–4 पोस्ट/सप्ताह एक व्यवहार्य लक्ष्य है; उदाहरण के लिए 2 शैक्षिक पोस्ट, 1 प्रोडक्ट‑फोकस्ड पोस्ट और हर महीने 1 सीज़नल या प्रमोशनल पोस्ट। रिपब्लिशिंग को राइट‑ऑफ नहीं समझें: पुराने पोस्ट में आँकड़े अपडेट करना, शीर्षक रीफ्रेम करना, नए प्रोडक्ट लिंक्स और FAQ जोड़ना पोस्ट की लाइफ बढ़ाता है और SEO को सुधारता है।
स्केल करने के लिए फ्रेम‑शिफ्ट का इस्तेमाल करें—एक ही गाइड को छोटे “how‑to” पोस्ट, पीक‑सीज़न संस्करण और सोशल‑फ्रेंडली क्लिप में बदलें। इमेज के साथ Shopify ब्लॉग पोस्ट शेड्यूलर और AI कंटेंट जेनरेटर से बड़े पैमाने पर टेम्पलेट बनाएं और बहुभाषी वर्ज़न पब्लिश करें। Trafficontent जैसे Shopify ब्लॉग स्वचालन ऐप ये सब करता है: SEO‑optimized आर्टिकल और स्मार्ट इमेज प्रॉम्प्ट्स बनाना, पोस्ट्स को शेड्यूल करना और Pinterest, X, LinkedIn पर ऑटो‑शेयर करना, साथ ही UTM ट्रैकिंग, FAQ स्कीमा और Open Graph प्रीव्यू भी सपोर्ट करता है—इससे आप जल्दी और संगठित तरीके से स्केल कर सकते हैं।
टीम वर्कफ़्लो को सुस्पष्ट रखें: review → approve → schedule. क्वालिटी कंट्रोल चेकलिस्ट में शामिल करें: हेडलाइन और मेटा टैग, इमेज alt‑text, अंदरूनी लिंक और प्रोडक्ट URL, तथ्य‑जाँच, ब्रांड वॉइस कंसिस्टेंसी और स्टेजिंग प्रीव्यू। ऑटोमेशन के साथ भी सैंपल पब्लिशिंग, ह्यूमन स्पॉट‑चेक और दो‑सप्ताह की एनालिटिक्स‑रिव्यू आवश्यक है ताकि ऑटो‑पब्लिशिंग के बावजूद क्वालिटी ड्रॉप न हो—Trafficontent में मैनुअल ओवरराइड और प्रीव्यू ऑप्शन्स होने से यह प्रक्रिया और भरोसेमंद बनती है।
मेट्रिक्स, ट्रैकिंग और ROI: क्या मापना है और कैसे
रिपोर्टिंग सेटअप के लिए सबसे सरल और असरदार तरीका है Google Analytics 4 (GA4) + Shopify Analytics को एक साथ देखना और Trafficontent के UTM/पब्लिश लॉग्स को जोड़ना। ट्रैक करने योग्य प्रमुख मीट्रिक्स रखें: कन्वर्ज़न (checkout_started, purchase), ऑर्गेनिक सेशंस, एवरेज एंगेजमेंट टाइम (GA4 में time on page/engagement), पेज‑व्यू, सोशल क्लिक और UTM कैम्पेन परफॉरमेंस (CTR, conversion rate)। Trafficontent पहले से UTM ऑटो‑टैगिंग और फुल ऑटो‑पब्लिश लॉग्स देता है — इन लॉग्स को CSV/वेबहुक के ज़रिये Google Sheets या BigQuery में भेजकर GA4 डेटा के साथ जोड़ें और Looker Studio में एक सप्ताहिक रिपोर्ट बनाएं। कब कोई ऑटो‑पब्लिश फेल हुआ है, कौन सा बैच शेड्यूल था और कौन सा content_variant पब्लिश हुआ — ये सभी घटनाएँ लॉग में रखें और >5% फेल्योर पर अलर्ट सेट करें।
A/B टेस्टिंग के लिए आसान और भरोसेमंद तरीका यह है कि हर वैरिएंट के लिए UTM या क्वेरी पैरामीटर इस्तेमाल करें — उदाहरण: utm_source=trafficontent&utm_medium=blog&utm_campaign=fall‑hat&utm_content=headlineA_imageB. वैरिएंट exposure और क्लिक GA4 इवेंट या कस्टम डाइमेंशन में रिकॉर्ड करें और कन्वर्ज़न को उसी UTM से अटैच करके तुलना करें। एक और आसान विकल्प है अलग‑अलग पब्लिशिंग (दो अलग URLs या दो पब्लिशिंग टाइम्स) और Trafficontent के पब्लिश लॉग में variant टैग रखना; बाद में GA4/Sheets/BigQuery में join करके CTR, time on page और purchase rate का मिलान करें। टेस्ट चलाने का फाइनल टिप: कम से कम 2–4 सप्ताह या पर्याप्त कन्वर्ज़न (statistical significance के हिसाब से) तक चलाएँ और सिर्फ headline/image पर बदलाव रखें ताकि परिणाम साफ़ मिले।